Adding an Audio Control Button set to your Subaru Wheel
It was so easy I decided to pull the wheel off my Forester (which had the full set already) just to show you all that you could be soon answering calls and skipping tracks just like factory BT!
There’s only 1 special tool required which you may already have, a T30 torque bit. Other than that just the willingness to remove an airbag and wheel, and you’ll soon see it’s not that scary. Now I should say I doubt this will work on a Sooby which has no buttons at all, or paddles, as they plug in to what is called a clock spring and I’m betting a buttonless one would be different. It should only take about 1 hour
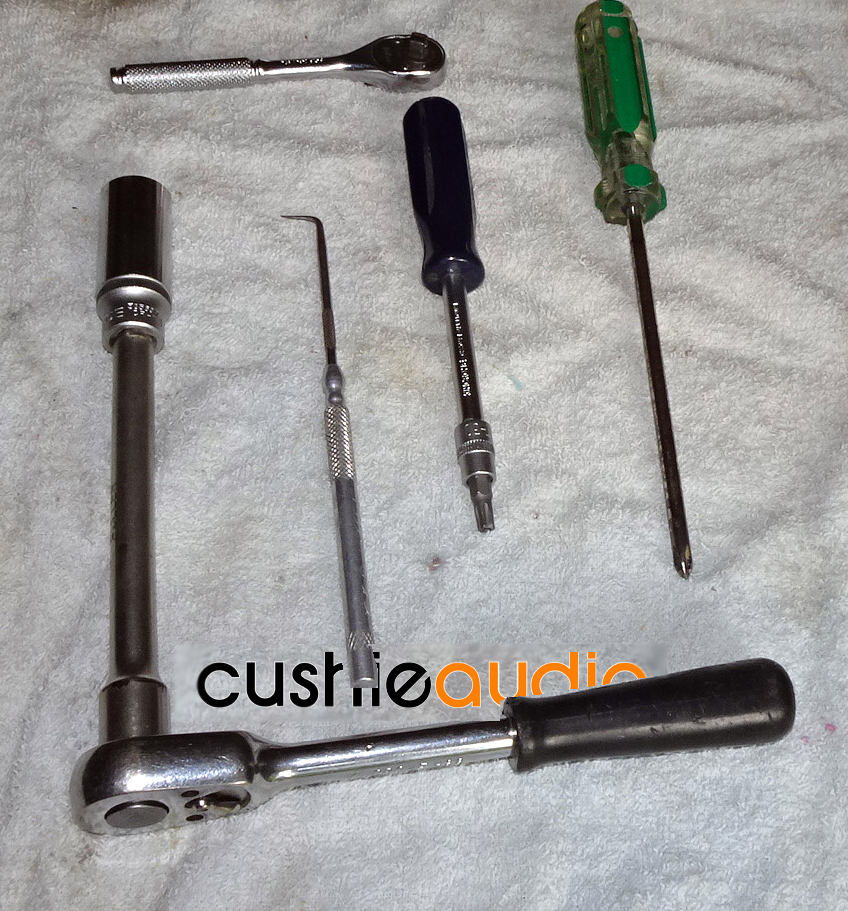
So here are the tools needed.
A 17mm socket with extension
Phlippits head screw driver( I convinced my daughter that’s what they’re called)
pick or something with a point
and as mentioned a T30 with a way to drive it
It’s time now to get the wheel as centred as possible so it goes back on straight.
Take your key out and put them somewhere away from the car, for if you turn the ignition on while the bag is out you’re off to the dealer to get them to reset the warning light.
Some will tell you to disconnect the battery and it’s a good idea. I didn’t.
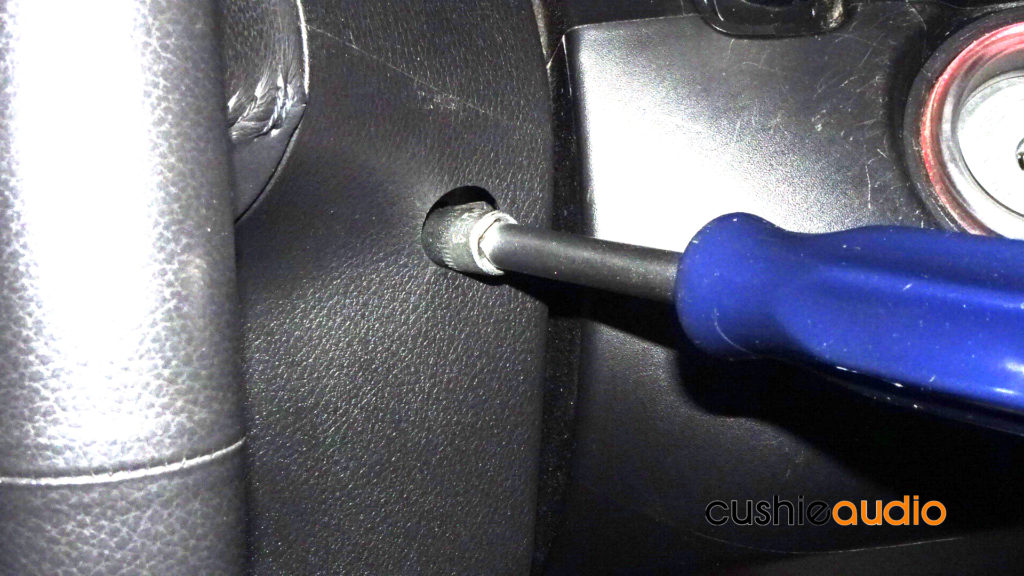
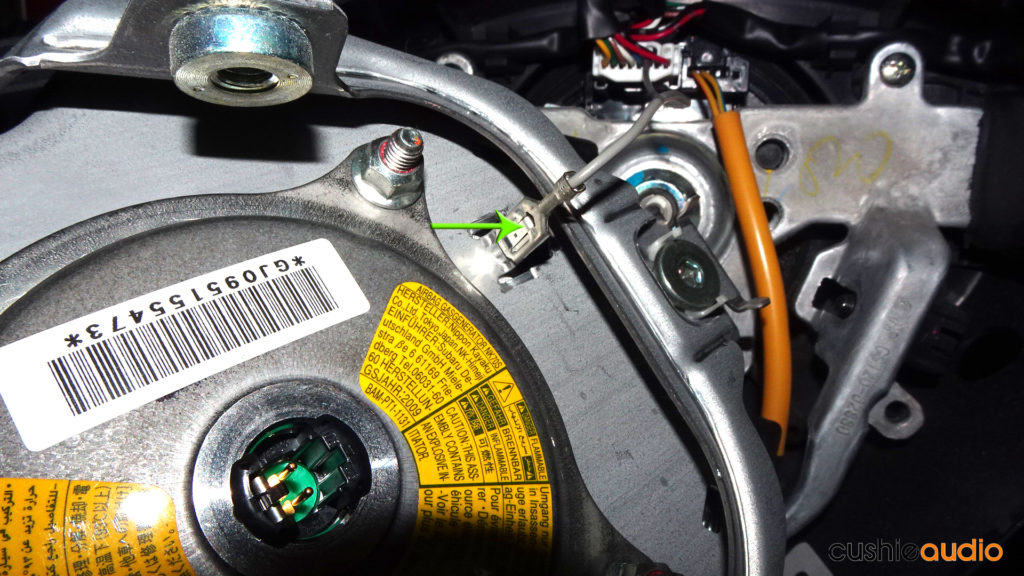
Once these are loose (they stay in there) the airbag separates. Just lift it off, there’s enough wire to tilt the top down and get it in a good spot
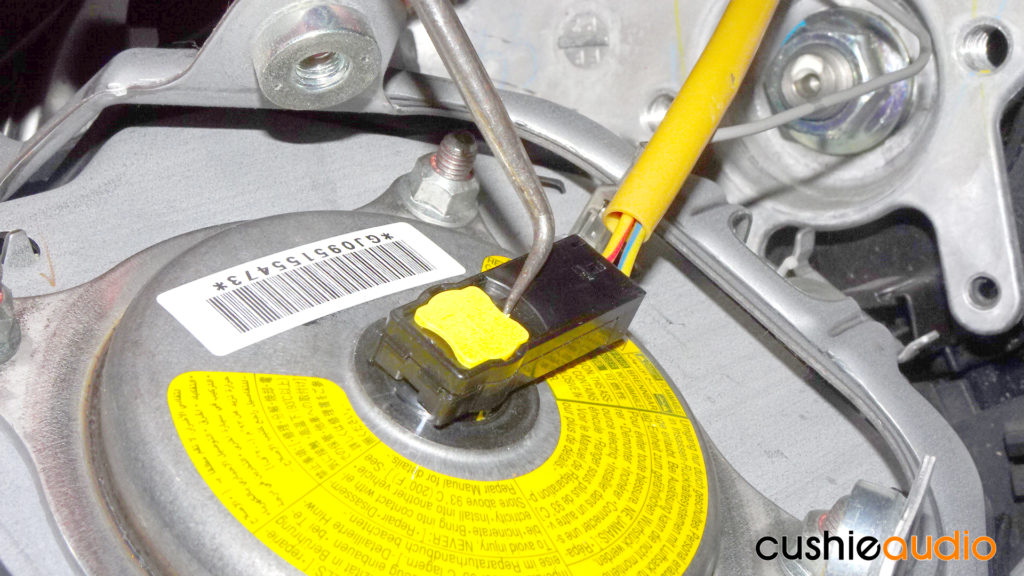
Compare the white plug you can now see, it should be the same size as your new ones but fewer wires. You can see the one I mean a few pics down.
Alternatively you could unplug the CC buttons now and try the new set before disconnecting the airbag. If you do this remember to get the keys away if you’re going ahead removing the air bag.
Swap sides and work it up
You wont break it BUT YOU CAN!
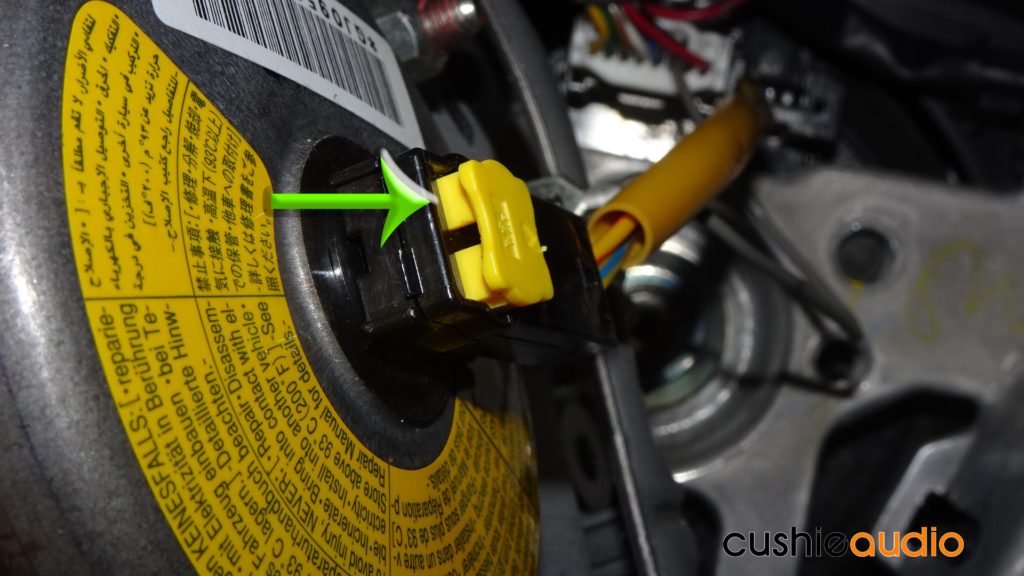
Then the whole connector will unplug.

If you tug and tug without the nut to stop it, it will smash you in the face when it lets go!
I have had this happen with very hard old fashion steering wheels. Twice!
If it wont budge you’re going to need a wheel puller. It will.
You can get a marking pen about now and mark the column and wheel to be sure of the alignment when refitting.
Now unplug the buttons from the clock spring, remove the nut and we have separation!
The airbag one in yellow stays
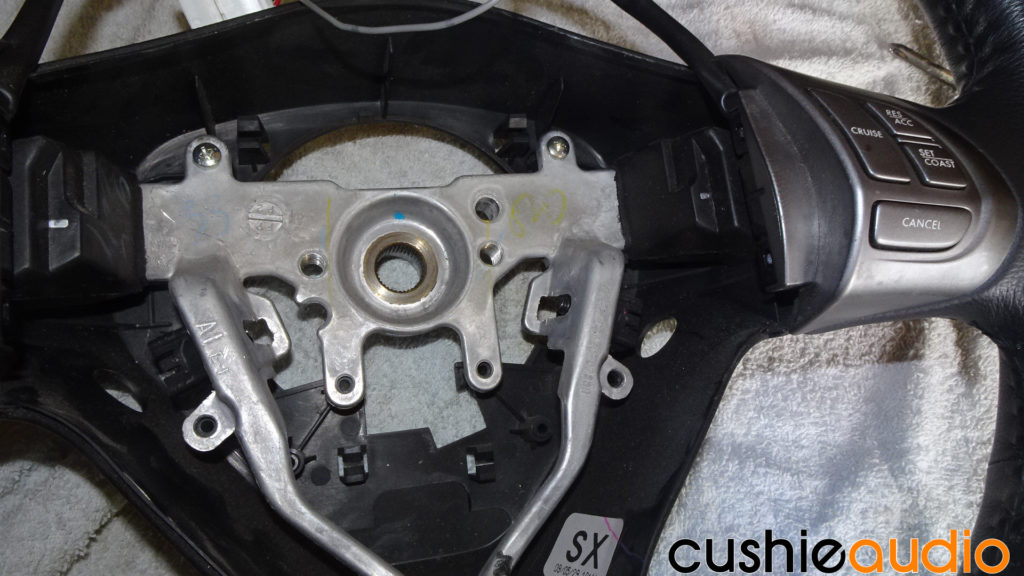
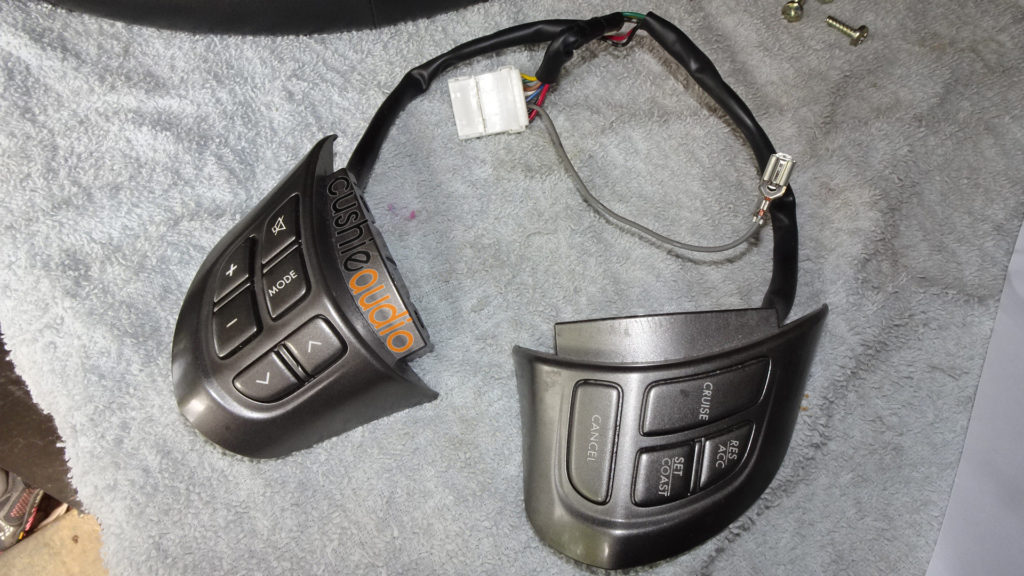
Screw them on and admire it all!

Put the cowl back on and seat the wires back in their little holders.
Time to put it all back together!

So plug it all back in carefully, dont over-tighten things and enjoy your (like) new car!
Leave a comment too so I can tell if anyone has even looked at this.
Cheers, Skot
George Kounelis
I have recently obtained the swc controls from Subaru genuine parts from a suby wrecker in Melbourne for $70 and fitted them to my 2007 Liberty. The audio controls did not work initially, it only worked on my 2009 liberty as the audio controls are plug and play ready. So I decided to investigate further using a multi meter from the connector on the steering wheel clockspring housing (ie the connector block into which the new swc controls connect) to the first terminal block below the clockspring mechanism. I discovered that pins 4 & 5 from the left hand side of the top connector were not connected to anything on the terminal block below the clockspring. Pin 4 is connected to light blue color white stripe wire and Pin 5 to red white strip wire to clockspring mechanism. It appears that Subaru must have changed their wiring harness sometime between MY07 and MY08 in order to enable the connection of steering wheel controls. This would explain why some people with MY06 MY07’s have not had any success.
The work around for this is quite simple. First remove the steering wheel (ps. removing steering wheel is optional if you already have installed the audio controls), can still work around adding wires from clockspring mechanism to stereo deck. Remove the upper and lower steering column covers and locate the large white harness multi-plug plug on the right hand side of the steering column. Disconnect this multi-plug and use your multimeter to establish which wires feed down from pins 4 & 5 on the top connector, through the clockspring mechanism, to this plug. On my car pin 4 was a light blue wire and pin 5 was a red wire with white traces on each at the lower plug. Then just splice a wire ( eg I used CAT5/6 pair wires) Solder each end, heat shrunk to each of these and ran the wires across to the back of the radio unit 8 way plug.
There is an 8 pin connector going into the back of the radio with only 3 wires connected. The green one is for override illumination brightness. The other two wires are purple and orange with white traces on each. Just connect the 2 wires you spliced at the steering wheel multi-plug into these two wires. I just took pot luck on which way to connect these two and it works fine. If it had not worked, I would have simply reversed this connection.
It’s hard to fathom why Subaru would fit a radio CD player with an obvious AUX in capabilty plus wiring in a connector for steering wheel controls without then completing the job and providing the swc’s and the actual AUX input as well, but there you have it…at least it can all be done. I trust that this post may serve to clarify this issue for those that follow and wish to “have a go”. May I say a big thank you to all the previous contributors, who took the time to report their findings, which I found to be extremely helpful.
Car: Liberty 2.5i MY 2006/2007
Skot Biner
Hey George,
Thanks so much for taking the time out to pass this on. It also tells me someone else has done it, and looked at my blog!
Cheers,
Skot
PS next time some pics would be nice : )